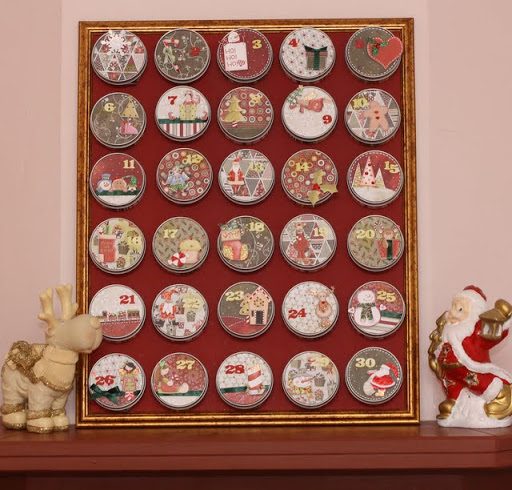
December is here so I wish you all a great month! My advent calendar is ready and in use. The kids love it and it’s a perfect decoration for my Christmas house! Here is a photo of it on the fireplace 🙂

Note: Keep in mind that tradition is different here. We find Santa’s gifts on 1st of January in Greece. So I needed 30 + 1 days on the calendar. On the 31 of December I’ll give the kids a letter so here is the rest of it.
“Making Of”________________________
Supplies:
- BasicGrey designer paper Wassail Collection 6×6
- favor tins 2,5 inches diameter
- neodymium magnets (really strong)
- Christmas stamps or digital images, ribbon, numbers and embellishments
- 40×50 cm frame
- deep red paint and brush
- metal sheet
Step1
Fist I decorated the tins with designer paper and images. I have used my CraftRobo alot for printing and cutting the digital images as well as the paper circles.


Step2
I bought a golden frame 40×50 cm, took off the front glass and the thin wooden backing.

I then painted the thin wood. I let it dry and then assembled the frame with the wooden back (I didn’t use the front glass).

Here is the metal sheet which was 100×20 cm since I couldn’t find one exactly as my frames dimensions (50×40 cm)

So I had to cut it in half to make two pieces of 50×20 cm each and then put them side by side to make a 50×40 piece. Pretty easy if your DH has many tools… Thank you Aris 😉


I then secured the two pieces on the back of the frame.

Step3
I used the neodymium magnets to put all the tins on the wooden frame. No need to attach the magnets on the back of the tins. Just put them inside!

They are so strong that they stick perfectly to the metal sheets although there are actually two layers between the magnet and the metal sheet! That is the magnet –>inside favor tin–>on top of thin wooden back –>on top of metal sheet.
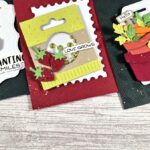
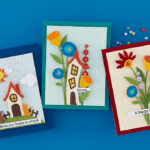
And here are some close-ups of the final result!


And here is a sneak peek on the treats (a little car, a Barbie dress, Christmas stickers, small tree ornaments, cookies, etc)

You can also check here and here. They are all versions of tin advent calendars. For more inspiration just take a look here.
Hope you enjoyed the post and got inspired. I’ll be back with a video on christmas tags!


omg is amazing i love it
Oh I have been so waiting to see the finished result. This is wonderful I bet the kids love it. Thanks so much for sharing the whole process!!!
Love the tins, and the kids will love the presents in them. Great blog!
WOW! Love this- simply amazing! I love that you shared the process as you were creating it! So cool!
Turned out wonderful!!! Bet your family loves it and can’t wait for each new day to come to see what’s hidden inside each of those lovely tins.
What a creative idea and I love how it turned out!
What a wonderfol project. Thank you for a tutorial
Francy
Oh, this turned out wonderful!! Each tin is decorated perfectly! Thanks for the inspiration!