
Art Journal Cover decoration
Hi! I decorated my art journal cover today! video tutorial You can enjoy the video at my YouTube...
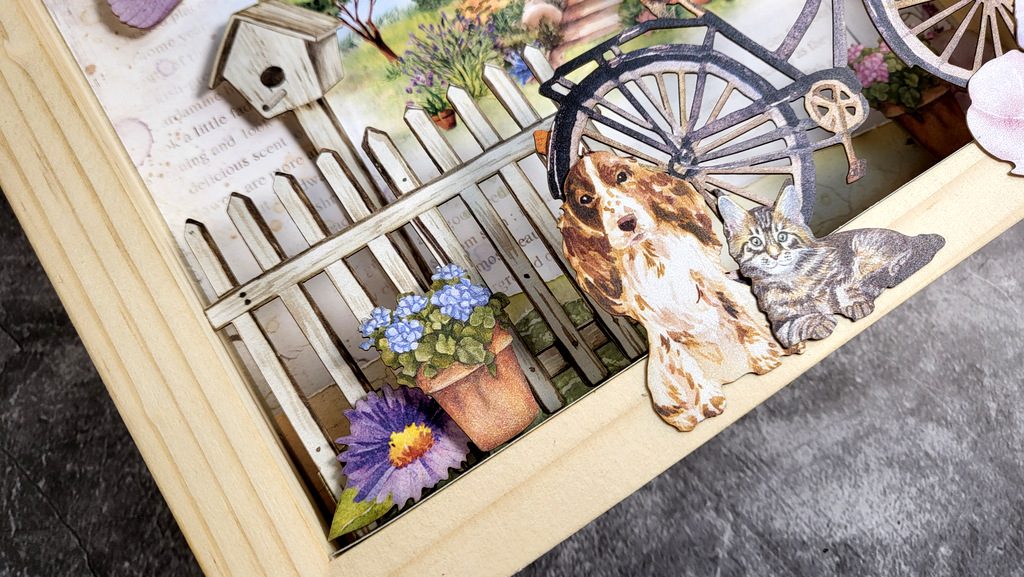
Shadow Box using Welcome Home collection
Hi! Today I have a fun project for you, a shadow box! It’s not difficult project and all...
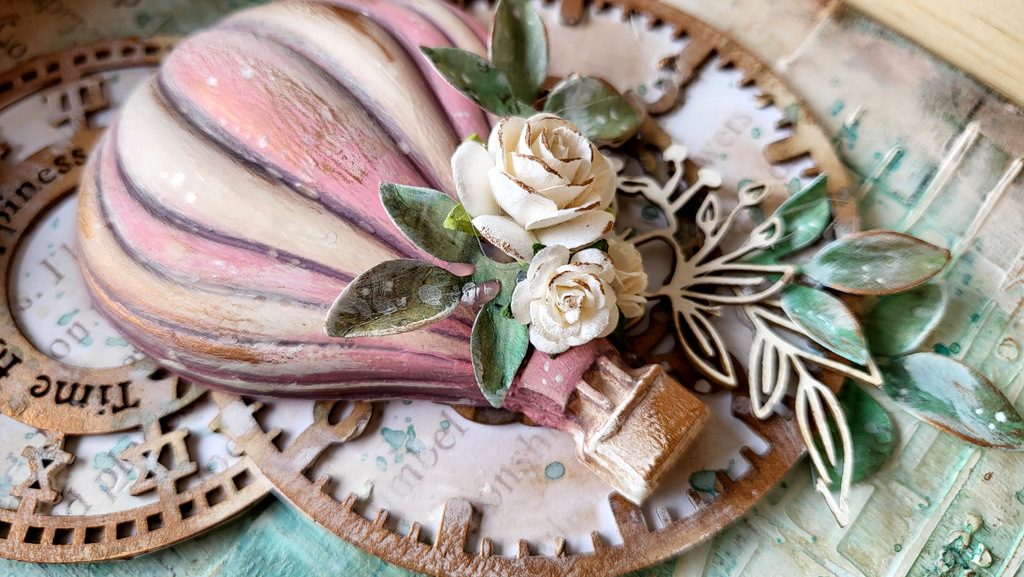
Mixed Media canvas – happiness !
Hi! Today I am sharing a mixed media project in a frame using moulds and other fun techniques!...
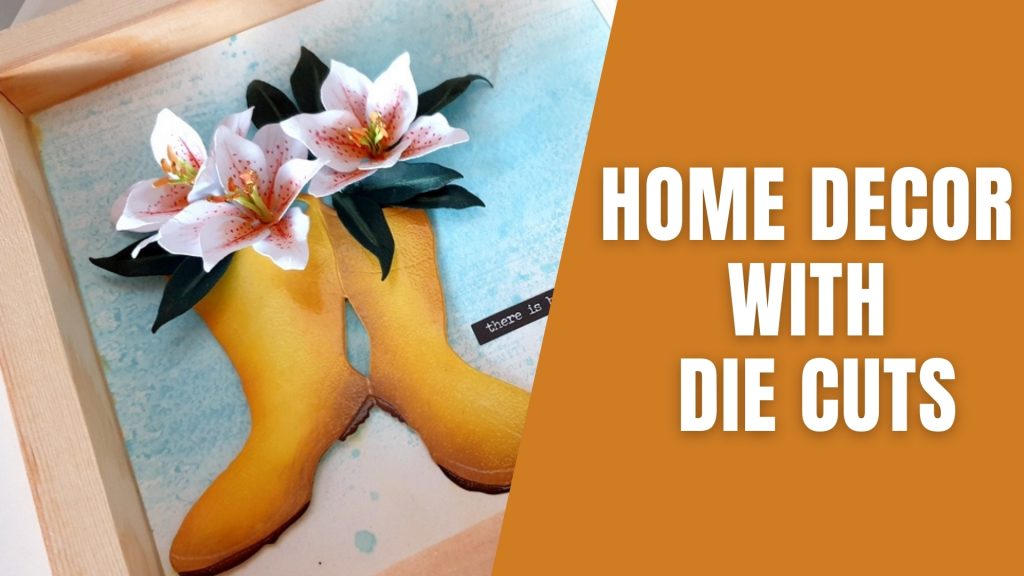
home decor with dies | Spellbinders Susan’s Garden
Hi! Today I have a home decor project using dies. It looks stunning but it’s so easy to...
Christmas art journal series | Week 3 – wooden background
Hi! Today I am back with the thirdvideo for my Christmas art journal series. I will be sharing...
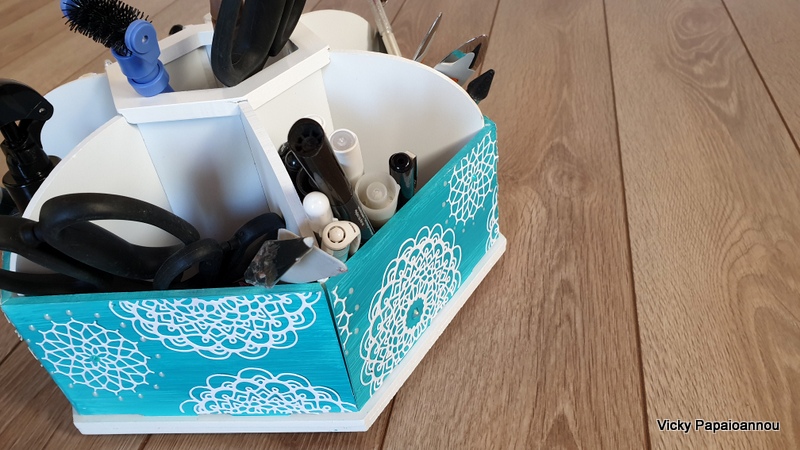
Make your own organizer | Art by Marlene
Hi! Today I am back with a different kind of project. It’s not a card or an art...
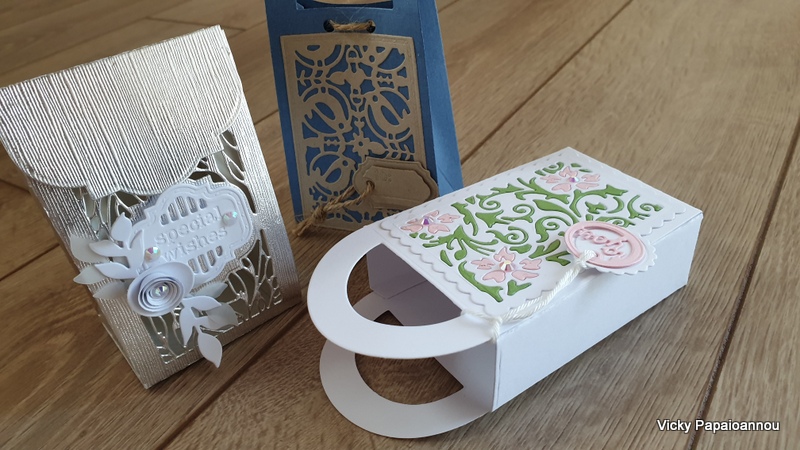
Perfect Party bag
Hi! Today I am back with even more party bags! It’s the 20th birthday of Tonic Studios and...
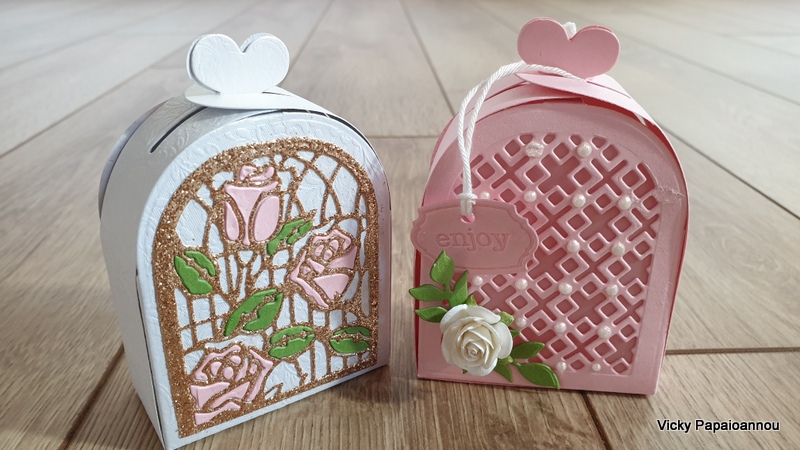
Gift Boxes | Designer’s Choice kit – July 2020
Hi! The new Designer’s Choice die set by Tonic Studios has been revealed and today I am sharing...
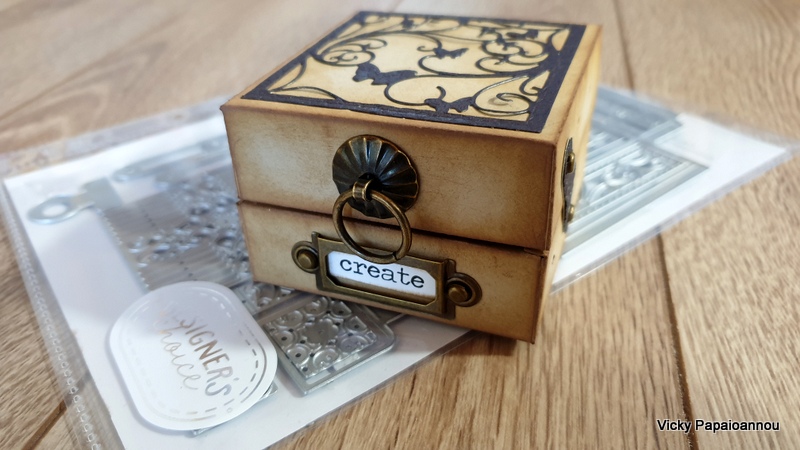
Vintage box | April Designer’s Choice
Hi! I have a vintage box for you today! The new Designer’s Choice die set by Tonic Studios...
