Welcome back ladies! Just a quick post today to share a couple of cards I made for Lily Pad cards with a photo tutorial and a video.
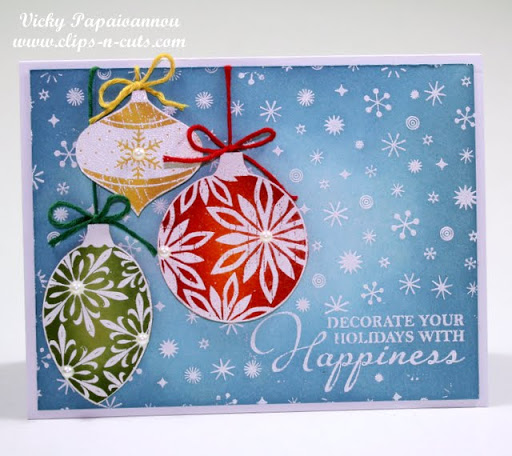
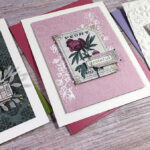
The first one I am sharing today is this ornament card I made for the sketch challenge here.

and here is a closer look

And if you want to see how I did this card here are some photos I took while I was making it
First I white embossed the three ornaments on white paper.

Clear embossing powder works fine also, but I like better the white one cause it is more vibrant.

and then I used distress inks to color the ornaments. I used a couple of shades on each one for a more natural effect:

I white embossed the sentiment

and then I stamped the sentiment on a post-it note. I cut around the sentiment close to the letters and so I created a mask.

I sticked the mask on top of the embossed sentiment and then I stamped my background image with versamark on top. This way the sentiment remains clear, without all those little snowflakes on top of it.

I then embossed the background and used my distress inks (yes, I am addicted to them)

Before I added the sentiments I spayed them with some “shimmer spritz” by Tsukineko. It really is amazing how they shine after that! But it is so difficult to take a proper photo of it.

For each ornament I chose a different floss color (yes! I got tons of these floss colors as long as the sew easy kit… which is amazing. You’ll see me using it soon)


If you have any questions please leave me a comment, and I’ll get back to you!
And last but not least here is the card from today’s how-to video. You can click HERE to watch the video.


Fab tutorial, Vicky! Both cards are so gorgeous! Love those ornaments! I just got that set and you’ve inspired me. . .thanks! 🙂
Both cards are fabulous!
Do you like the sew easy tool? I’ve been tempted several times to buy it but wondered if it was really as good as some claim…
I have it just for a couple of weeks. I plan on using it on one of my Sunday videos, so stay tuned. I like it cause I never bother to take my sewing machine out and stitch on cards. So this is perfect. But if you use your sewing machine then I wouldn’t recommend it.
I’d love to see a video w/how you use the sew easy! I dread the idea of having to pull out a sewing machine for cards so I’m really interested in seeing this tool working in action!
Thanks for the reply!
Hello Vicky…I just loved your cards. I watch your videos every sunday. I live in the Dominican Republic, there used to be a scrapbooking store here and there were classes every week but it closed last year. You can’t imagine how much I have learned from your videos, the techniques, new products, I have bought new materials…you have been an inspiration!! Thank you so much…too bad I don’t have a blog to participate in the challenges…Congratulations and thank you so much!!!
Thank you Maria! You are so sweet!
Gorgeous cards Vicky. Btw. I could’t comment on your hubby’s card …he did a great job:)
hubby is thrilled with all the comments… however I hope he willl stay away from my craft room for a while… I can deal with just my own mess in my crafting table … LOL!!!!
Your work with distress inks is truly amazing! And got me so tempted that my order for distress inks and blending foam is on the way 🙂
Love them! So vibrant and pretty.. Amazing distressing!
Love your ornament and snowflake background–
who’s stamps are they
thank you
hugs
You can find a full linked list on this post http://www.lilypad.inlinkz.com/2011/09/16/hero-arts-presents-a-sketch-challenge/
I adore those ornaments! I got some sparkly fun flock that I think would be so cute, thanks for the inspiration! BTW-I’ve got a sew easy w/ several “heads” and I LOVE them! I’m trying to get better at “aiming” where I want to start and stop my holes. Looking forward to seeing you use it!
Super beautiful cards, Vicky!! WOW! Thanks for sharing the steps in the tut.
Does the distressing ink not show up on the embossed parts? Or are you just really careful not to get ink on the embossed parts?
The card is beautiful! Thanks for sharing.
Hi Shyla, the embossing powder when is set with heat it resists the distress ink. That means that even if I cover it with distress ink, the ink does not dry on it and you can just wipe it with a cloth or leave it as is. It will stay white. But make sure you use Distress ink for this technique. Chalk or dye inks does not work like that. Hope I’ve helped.